Chapter 2 – Set Up
For production scheduling implementation, we should consider capacity strategy which be related to Cost Center and Work Center
Cost Center normally will represent the production process or production section which production cost will be allocated to any orders when any orders was built in these operations
Work Center in basically will represent the group of machines or a machine (or assembly line) and under the related Cost Center
We can use a work center for a bottleneck machine. Or use a work center for a group of machines, but do not forget that, capacity of this work center will accumulate from the capacity of each machine. Scheduler123 has “UPH” field, stand for unit per hour, for work center capacity.
2-1 Set up Cost Center
Step 1: Click on “Cost Center” worksheet to set up cost center information.

Step 2: Input Cost Center information
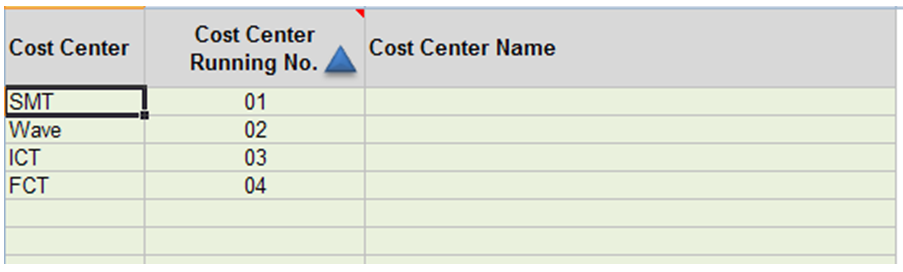
Cost Center: cost center number
Cost Center Running No.: running number for report sorting
Cost Center Name: cost center name (for your custom reports)
2-2 Set up Work Center
Step 1: Click on “Work Center” worksheet to set up work center information.

Step 2: Input Work Center information
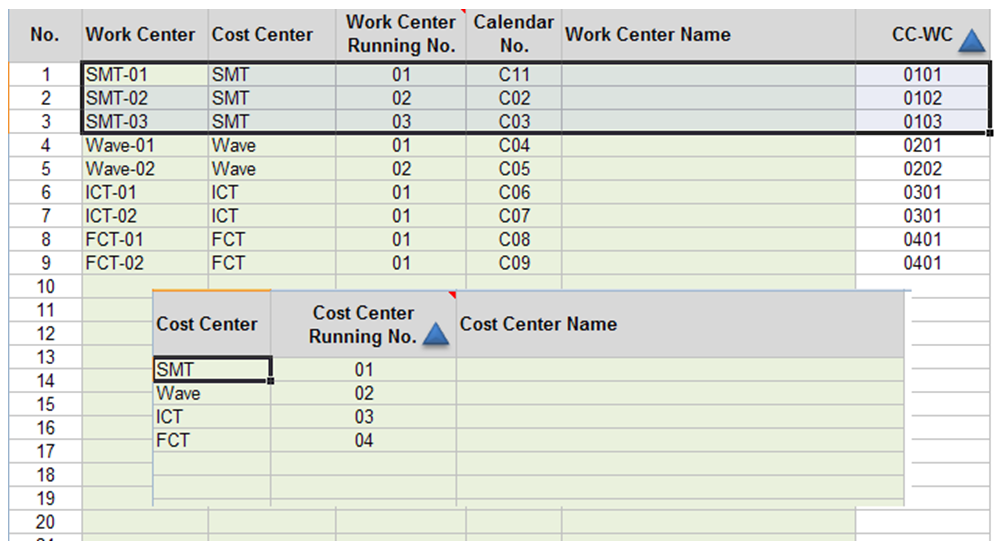
Work Center: work center number
Cost Center: assign cost center which this work center under to
Work Center Running No.: running number within own cost center for report sorting purpose
Calendar Number: assign calendar to work center.
If you want to dedicate one calendar per one work center like an example above, you can have 20 calendars for this. But if some work centers have no need to schedule in more accurate, such as record line will be shut down for 2 hours on next Monday, you can share calendar with other, therefore you can have calendar to support up to 100 work centers.
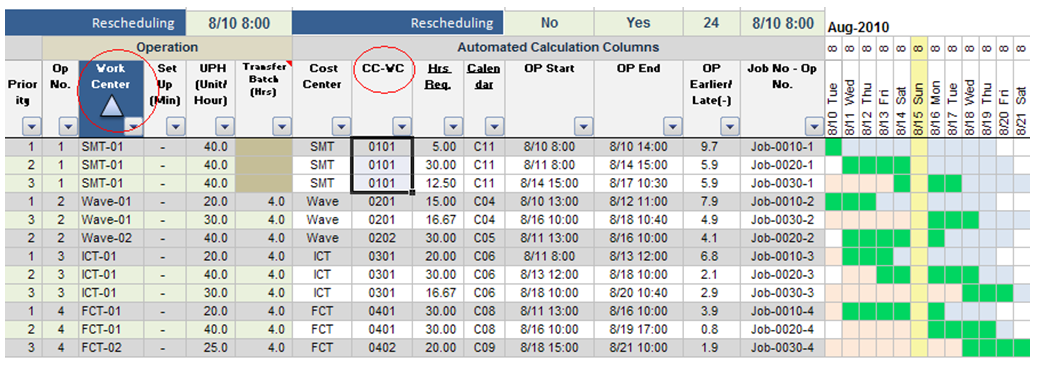
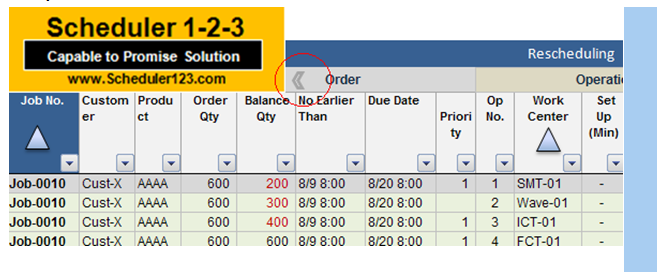
CCWC: the number which be combined automatically from Cost Center Running No. and Work Center Running No. and use for sorting propose; see below an example of CCWC in “Scheduler Workbench” worksheet, sort by Work Center.
Demonstration Video: How to Configure Cost Center & Work Center
2-3 Set up Working Time & Break Time
Step 1: Click on “Working Time” worksheet to set up working time information

Step 2: Adjust break time of desired hour of day of the week
In each calendar, we can set up working time or break time of every week from Monday to Sunday as standard template. For an example, every Saturday will use break time per this set up. The specific Saturday with difference break time will be adjust individual in next session (2-4 Set up Calendar)
It has 3 templates per calendar: Monday-Friday, Saturday, and Sunday. You have 3 columns from right for break time adjustment, the rest column for viewing only.
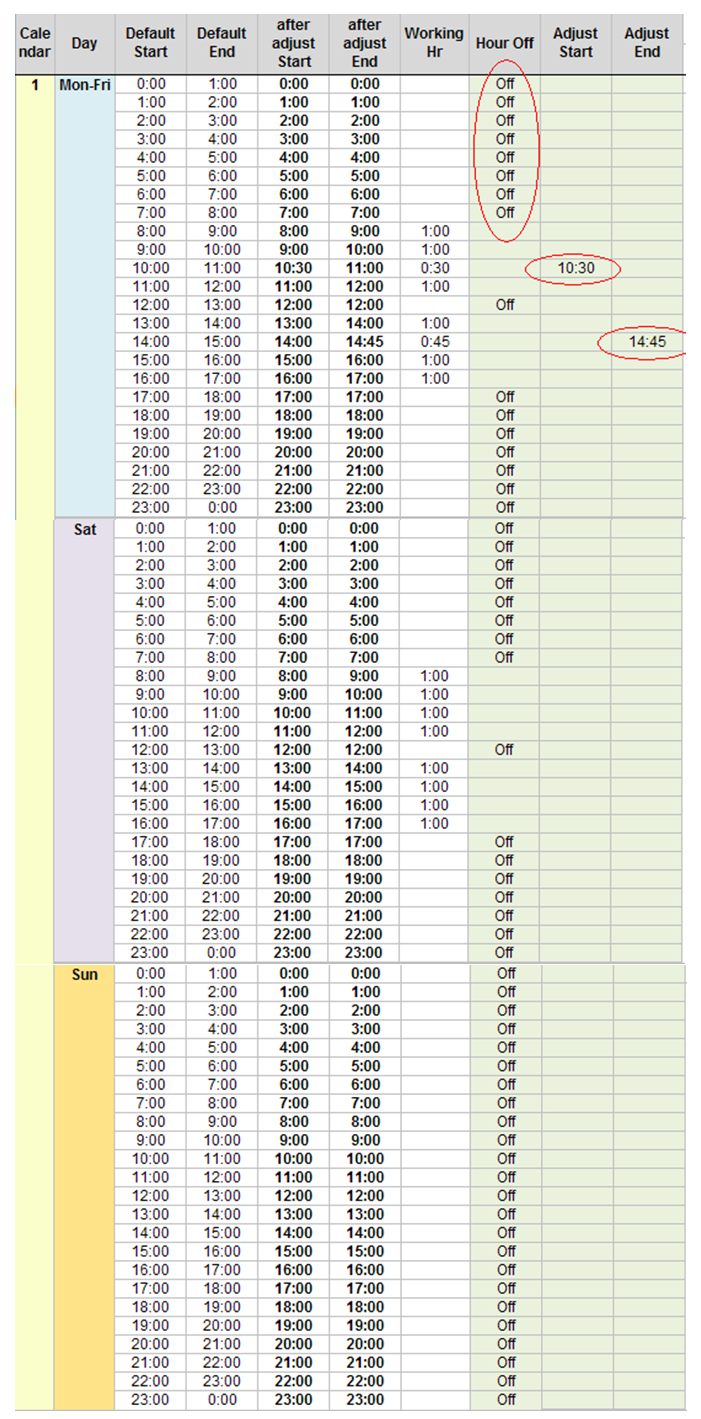
The “Default Start” and “Default End” of each row represent one standard hour, total 24 hour per day.
The result after adjust will show on “after adjust Start” and “after adjust End” columns
Per above example;
• If “Hour Off” = “Off”, the working hour of that row will be zero.
• If you adjust Start time = 10:30, working hour of that row will start at 10:30 and end at 11:00, total working time = 0:30 Hour or 30 munities.
• If you adjust End time = 14:45, working hour of that row will start at 14:00 and end at 14:45, total working time = 0:45 Hour or 45 munities.
Demonstration Video – Working Time & Break Time
Change calendar from 8 to 7 working hour/day(c01->c11) Deduct 1-hour Break Time per Day(10:00-10:30,15:00-15:30)
All calendars in this demonstration, C01-C09, use the same working schedule like this: Working Day: Monday-Saturday ( 6 day per week ) Working Hour: 8:00-12:00, 13:00-17:00 ( 8 hour per day )
In this demo we will use Job-0010, Op No.1 (SMT-01), we will change SMT-01’s calendar which currently use calendar-1(C01) switch to calendar-11(C11) which we set working schedule as follow:
Working Day: Monday-Saturday ( 6 day per week ) Working Hour: 8:00-12:00, 13:00-17:00 break time 10:00-10:30 and 15:00:15:30( total working hour =7 hour per day )
While total hour required is 10 hour and operation start date is Mon 8/9/2010 8:00, the result of operation end date will change from 8/10/2010 10:00 to 8/10/2010 11:30
2-4 Set up Calendar
Step 1: Click on “Calendar” worksheet to set up calendar information.

Step 2: Adjust working time or break time of the specific date
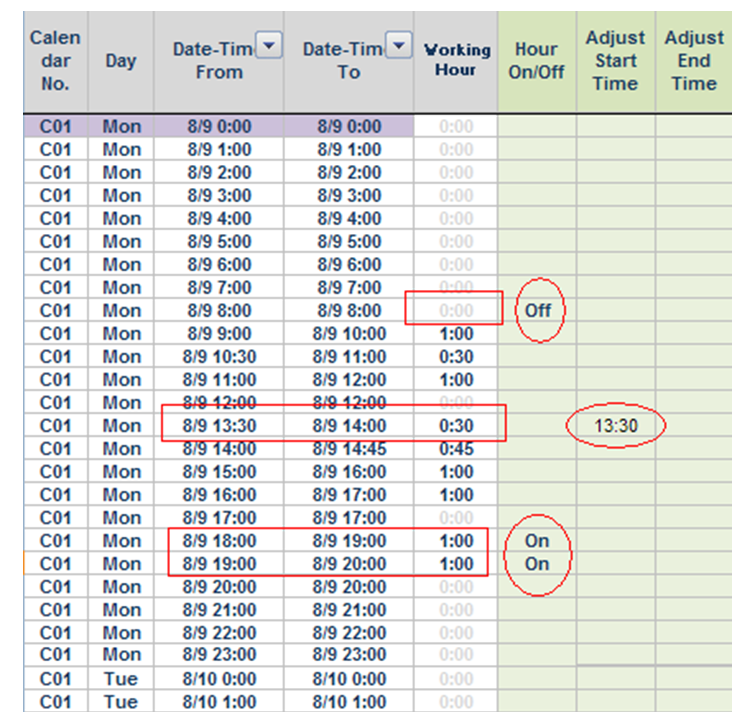
The set up data of weekly working time template of each calendar will effect on every day of each calendar. If we need to deduct idle time or add capacity in the specific date you need to adjust directly at that time
Such as;
• Preventive Maintenance on Mon 8/9/2010 during 8:00 – 9:00
o Set “Off” at 8:00 – 9:00
• Special break time on Mon 8/9/2010 during 13:00 – 13:30
o Adjust start time = 13:30
• Overtime on Mon 8/9/2010 during 18:00 – 20:00
o Set “On” at 18:00-19:00 and 19:00-20:00
See data inside of red border which support for these examples.
Demonstration Video – Working with Calendar : Add 4-hour Overtime on Sunday
This demonstration will show you to increase capacity at SMT-01 by add 4-hour overtime on Sun 8/15/2010 during 8:00 – 12:00
Reserve 1-Hour Preventive Maintenance
www.planning-templates.com/mini-course-part-c-2-2-2.html
This demonstration will show you to decrease capacity by 1-hour preventive maintenance at 8:00 – 9:00 on Tue 8/10/2010
Step 3: Update Calendar in Weekly or Monthly basis.
Each calendar will have 62 days supporting for 2-month production scheduling and can be automated update in weekly, bi-weekly or monthly basis depend on your time-fence scheduling. For an example if your plan is weekly schedule, you may update calendar every end of month.
To update calendar, click on “Update Next Week” button. All 20 calendars of Scheduler123 will be updated and shift to next week. All related day off, day on, specific break time will shift correctly.
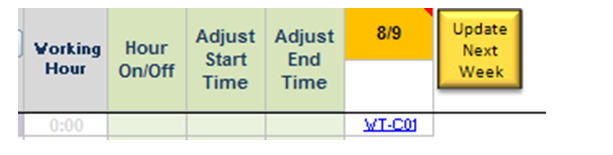
Click on “Update Next Week” button for 2 times mean update to next two week. If Day 1 is 8/9/2010, after click 2 times Day 1will change to 8/23/2010.
2-5 Create Customer Information
Step 1: Click on “Customer” worksheet to create customer information.

Step 2: Create Customer information
Customer Data: Customer (required), Customer Name (option), 5 user-defined fields (option)
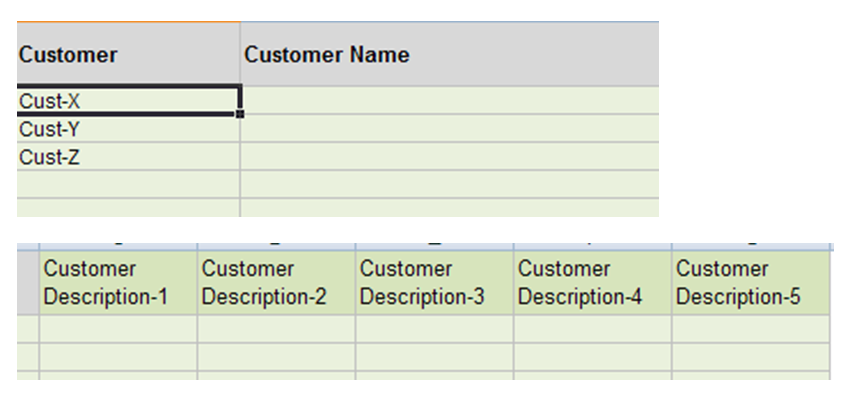
For implementation phase, we can import current customer in one time. (Use copy and paste special-value)
When receive new job order but ordered by current customer, you can load new job order and select current customer in drop down list in “Scheduler Workbench”.
But if ordered by new customer, you must add new customer in this “Customer” worksheet before load new job order.
2-6 Create Product Information
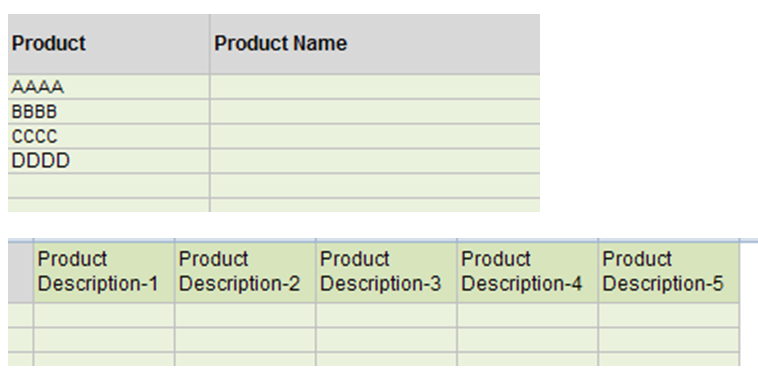
Step 1: Click on “Product” worksheet to create product information.

Step 2: Create Product information
Product Data: Product (required), Product Name (option), 5 user-defined fields (option)
For implementation phase, we can import current product data in one time. (Use copy and paste special-value)
When receive new job order but ordered by current product, you can load new job order and select current product in drop down list in “Scheduler Workbench”.
But if job order have new product, you must add new product in this “Customer” worksheet before load new job order.
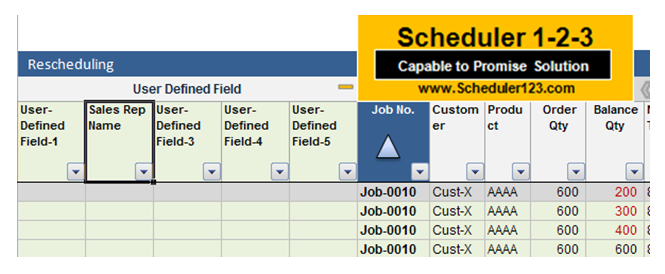
2-7 Create User-defined field Header Name
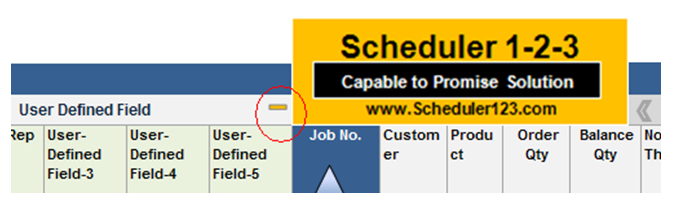
Step 1: Click on button to see unhide 5 user-defined fields
The result after “Unhide”
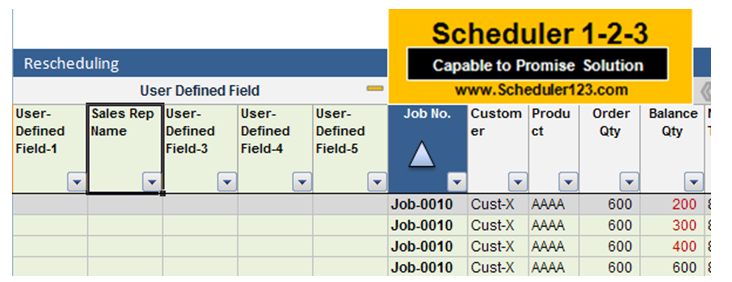
Step 2: Click on “UDF” worksheet to create header name of 5 user-defined fields

This example key “Sales Rep Name”
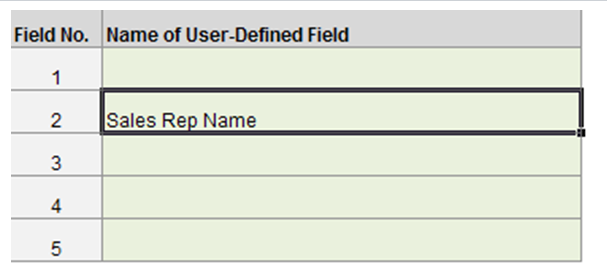
The result is…
Click on to hide them